LaTeX命令速查_列表
一、列表
1 | \begin{document} |
二、表格
1 | \begin{document} |
1 | \begin{document} |
1 | \begin{document} |
单独成行使用LaTeX的方式是用双$包裹LaTeX语法
1 | $$ |
效果如下:
$$(填入LaTeX语法内容)$$
直接在行间使用单$包裹LaTeX语法
1 | 在行间使用时直接在行间添加$ ... $即可 |
效果如下:$(填入LaTeX语法内容)$
参考:
Cmd Markdown 公式指导手册 - 作业部落 Cmd Markdown 编辑阅读器 (zybuluo.com)
typora常用的数学公式编辑语法 - Wreng - 博客园 (cnblogs.com)
Markdown数学公式语法 - 简书 (jianshu.com)
说明1:在align环境下, &符号就是”对齐的位置”,放置在最左边就是多行公式左对齐; Markdown公式以不同方式对齐_CA727的博客-CSDN博客_markdown公式对齐
$$
\begin{align}
f(x) &= x^2 + 2x + 1
&= (x + 1)^2 \tag{1} \
&= 2^2 + 2 \times 2 + 1
&= 9 \tag{2} \
\end{align}
$$
1 | \begin{align} |
说明2:\符号是每一行公式结束后的换行。
$$
第一行\
第二行
$$
1 | 第一行\\ |
$$
a_1^2\
b_{12}\
2^{x^2+y}\
2H^{+}+SO_{4}^{2-}=H_{2}SO_{4}
$$
1 | a_1^2\\ |
$$
\frac{x}{1+x^2}
\
\frac{\frac{1}{2}+x}{y}
\
\tfrac{a}{b}
\frac{a}{b}
$$
1 | \frac{x}{1+x^2} |
$$
\sqrt{x}
\sqrt[3]{x}
$$
1 | \sqrt{x} |
$$
\binom{n}{k}
\tbinom{n}{k}
$$
1 | \binom{n}{k} |
$$
f’
f’’
f^{(n)}
$$
1 | f' |
$$
\int_{1}^{2}f(x) \
\intop_{2}^{1}f(x) \
\oint f(x) \
\smallint f(x) \
\
\iint f(x,y) \
\oiint f(x,y) \
\iiint f(x,y) \
\oiiint f(x,y) \
$$
1 | \int_{1}^{2}f(x) \\ |
$$
\lim_{k \to \infty}
\lim\limits_{k \to \infty}
\lim\nolimits_{k \to \infty}
$$
1 | \lim_{k \to \infty} |
$$
\begin{align}
\mathrm{d}x
\end{align}
$$
1 | \begin{align} |
$$
\sum_{i=1}^{k}
\displaystyle\sum_{i=1}^n
\textstyle\sum_{i=1}^n
\
\prod_{i=1}^{k}
\displaystyle\prod_{i=1}^n
\textstyle\prod_{i=1}^n
$$
1 |
$$
x \pmod a
\
2\mod{x}
$$
1 |
$$
\pi \
e \
a \cdot b \
a \times b \
a \div b \
$$
1 |
$$
A = \begin{matrix}
a & b\
c & d
\end{matrix}
\
B = \begin{pmatrix}
a & b\
c & d
\end{pmatrix}
\
C = \begin{vmatrix}
a & b\
c & d
\end{vmatrix}
\
D = \begin{bmatrix}
a & b\
c & d
\end{bmatrix}
\
E = \begin{Vmatrix}
a & b\
c & d
\end{Vmatrix}
\
F = \begin{Bmatrix}
a & b\
c & d
\end{Bmatrix}
\
$$
1 | A = \begin{matrix} |
$$
[A\ b] =
\begin{bmatrix}
\begin{array}{c c c|c}
a_{11} & a_{12} & a_{13} & b_1\
a_{21} & a_{22} & a_{23} & b_2\
a_{31} & a_{32} & a_{33} & b_3\
\end{array}
\end{bmatrix}
\
$$
1 | [A\ b] = |
$$
\begin{array}{c:c:c}
a & b & c \
\hline
d & e & f \
\hdashline
g & h & i \
\end{array}
\
$$
1 | \begin{array}{c:c:c} |
$$
L_{n\times n} = \begin{bmatrix}
a_{11} & a_{12} & \cdots & a_{1n} \
a_{21} & a_{22} & \cdots & a_{2n} \
\vdots & \vdots &\ddots & \vdots\
a_{n1} & a_{n2} & \cdots & a_{nn} \
\end{bmatrix}
\
$$
1 | L_{n\times n} = \begin{bmatrix} |
说明:用&来实现对齐
$$
\begin{aligned}
f(x) &= (x+1)^2\
&= x^2 + 2x + 1
\end{aligned}
\
f(x) = \begin{cases}
x + 2y &= 1 &\text{if a}\
3x - y &= 5 &\text{if b}\
\end{cases}
$$
1 | \begin{aligned} |
参考: Markdown 图片 | 菜鸟教程 (runoob.com)
1 |  |
markdown中可以用图片base64加密得到的字符串来显示
1 |  |
注:中间变量使用方式可以实现将长串的base64储存于文章末尾,然后再文章中部通过变量名来调用该字符从而可以再任意位置展示图片
具体参考 【记录】如何使用Markdown中的变量_脆鲨Nana7mi的博客-CSDN博客_markdown 变量
主要参考: 个人博客搭建教程 | 爱扑bug的熊 (cuijiacai.com)
官网下载安装软件并手动安装
安装hexo
1 | # 配置npm的国内镜像 |
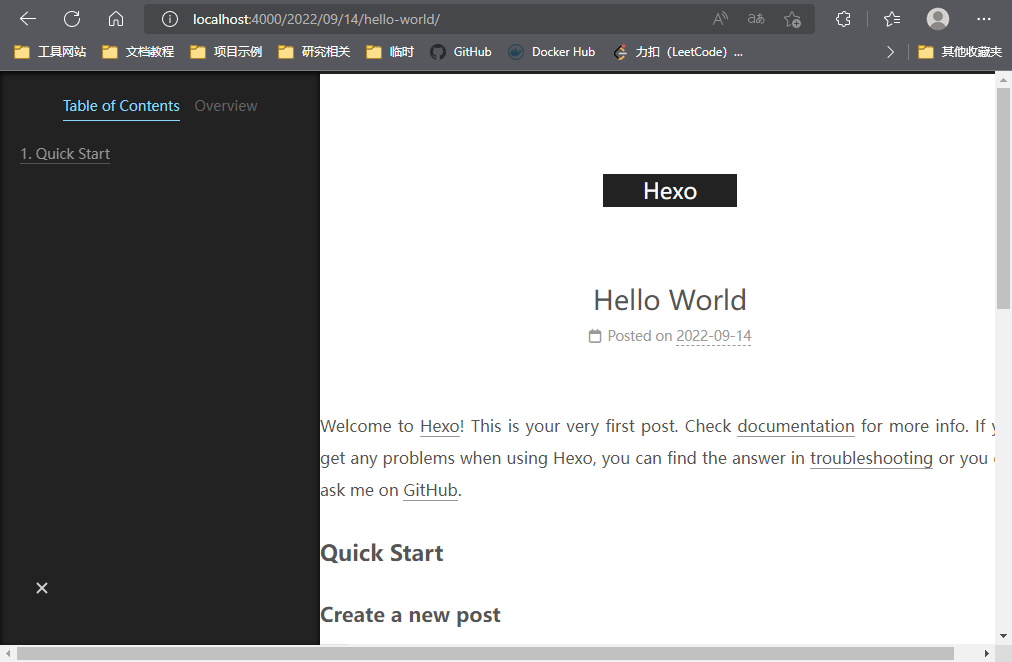
测试hexo
1 | # 创建文章(markdown格式) |
运行结果

安装测试成功
自行修改
1 | # Site |
为了后续netlify建站方便,我们可以在package.json里面添加一个命令:
1 | |
1 | cd "博客目录" |
注:如果之前是使用git clone下载源码的方式安装next主题的话,需要将next主题路径下的git相关文件删除,否则这里push时会将next视作另一个仓库作为链接上传至仓库
Netlify是一个国外的免费的提供静态网站部署服务的平台,能够将托管 GitHub,GitLab 等上的静态网站部署上线。至于我们为什么不使用github自带的gitpage,原因很简单,访问速度慢。此外,Netlify还有很多别的功能支持,这里不作剧透,可以自行探索。
注册登录https://app.netlify.com/后,选择使用github已有仓库来install,可以只选择想建站的仓库,不用勾选其他仓库。
到以下页面时,修改build command为
1 | npm run netlify |

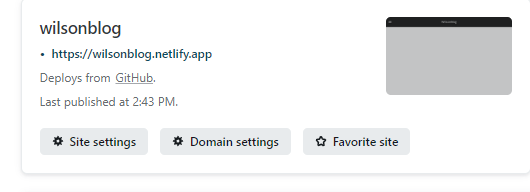
配置成功后,如果部署成功,可以得到一个url,对应我们的博客;如果不成功可以检查日志查找原因

这个域名是netligy为你的网站分配的域名,如果希望修改成xxxx.netlify.app,就需要将你的部署网站的sitename修改为对应得xxxx

如果希望将上述的xxxx.netlify.app解析至自己已有的域名上,需要进行如下操作
前往自己域名服务提供商处解析域名,我使用的是阿里的域名(记得提前实名备案)

然后再回到netlify网址上配置一下自己的用户域名,这样的话可以在国外获得netlify本身的CDN支持。
具体步骤见参考文章中图片过程,成功结果如下所示:

至此,不论是 WilsonBlog 还是 WilsonBlog (wilsongogo.top) 都可以用于访问博客网址了
Netlify 虽然已经提供了 CDN 加速,但在使用过程中发现国内访问还是比较慢,Cloudflare 相对于国内的七牛云、阿里云等云服务商的 CDN 速度会慢一些,但是它有免费版本,而且最重要的是域名不用备案。
而且听说cloudflare有预防ddos的5s墙功能,因此选择试用Cloudflare
1.首先添加根域名至Cloudflare,然后选择免费套餐(仍拥有ddos防护功能)
2.随后在查找出的记录中寻找之前添加的CNAME类型,如未查到对应记录,可以手动添加(我这里使用了手动添加)

3.在域名服务商处修改dns解析服务器为cloudflare地址


现在netlify一般会自动配置好,也可以通过下图按钮使用自己的CA证书

参考: Getting Started | NexT (theme-next.js.org)
使用源码安装
1 | # 进入项目根目录 |
修改配置文件./_config.yml
1 | # 将原内容 |
再次启动项目并访问
测试成功
前往 Highlight (theme-next.js.org) 查找需要的高亮主题,并复制网址上的配置内容分别至对应Hexo的_config.yml与NexT的_config.yml中
示例:
1 | # Hexo的_config.yml |
1 | # NexT的_config.yml |
参考: hexo之next主题添加分类_DrCrypto的博客-CSDN博客_hexo next 分类
在NexT主题的_config.yml中修改以下部分生效(取消注释即可)
1 | # --------------------------------------------------------------- |
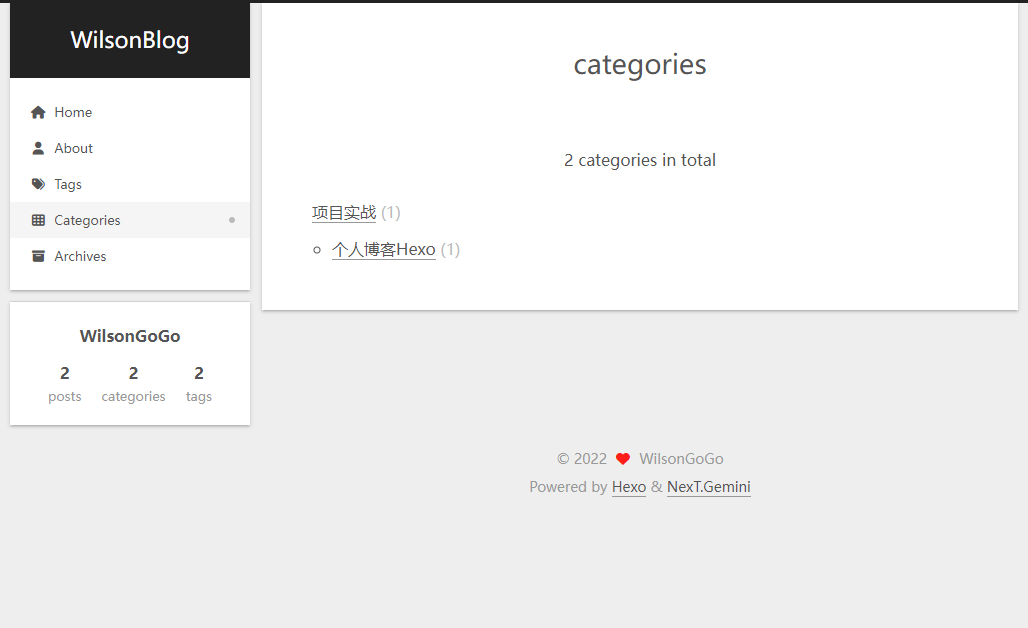
使用hexo命令创建categories页
1 | PS D:\WorkSpace\Coding\Git\myHexo> hexo new page categories |
修改对应index.md内容如下
1 | --- |
在文章起始位置添加categories信息
1 | --- |
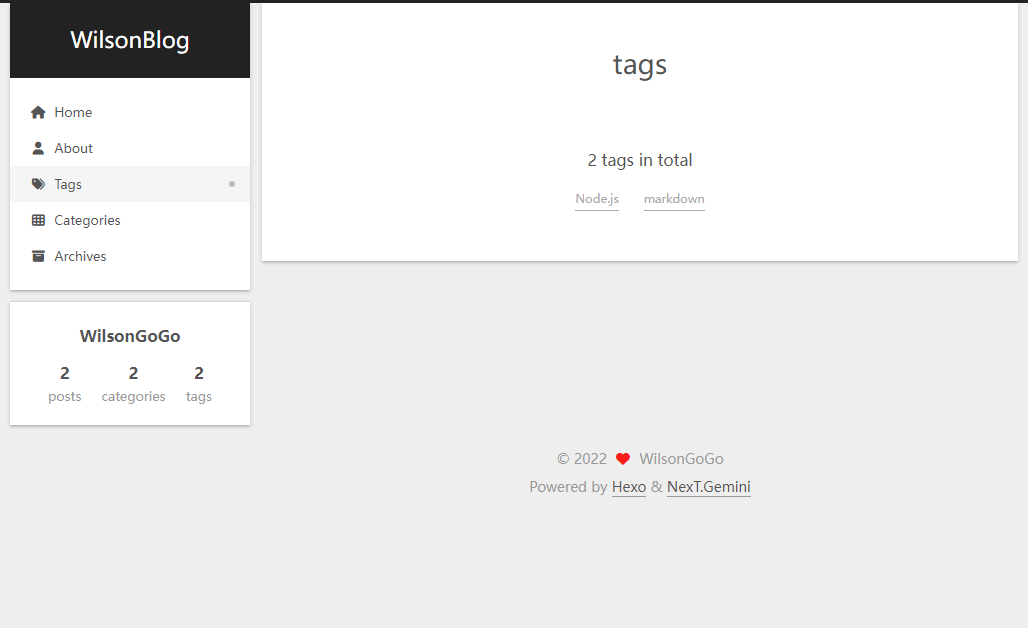
使用hexo命令创建tags页面
1 | PS D:\WorkSpace\Coding\Git\myHexo> hexo new page tags |
修改对应index.md内容如下
1 | --- |
在文章起始位置添加tags信息
1 | --- |
参考:
hexo的next主题个性化配置 - 知乎 (zhihu.com)
Hexo+Next主题的一些实用插件和美化升级_next 单行代码 美观优化_小王同学w的博客-CSDN博客
修改配置文件 ./themes/next/_config.yml
1 | toc: |
修改配置文件 ./themes/next/_config.yml
1 | favicon: |
favicon-nxn-next.png 均位于 ./themes/next/source/images目录
修改配置文件 ./themes/next/_config.yml
1 | codeblock: |
修改配置文件 ./themes/next/_config.yml
1 | social: |
修改主题配置文件 ./themes/next/_config.yml
1 | # Show Views / Visitors of the website / page with busuanzi. |
注:该模块具体html代码设置已在./themes/next/layout/_partials/footer.njk文件中,但是可以通过主题配置文件中配置开选择是否启用相关代码
在./themes/next/layout/_layout.njk文件中进行配置
1 | <body itemscope itemtype="http://schema.org/WebPage"{% if theme.motion.enable %} class="use-motion"{% endif %}> |
需要插入的该行代码可由以下网址生成
GitHub Ribbons | The GitHub Blog
在 ./themes/next/layout/_partials/footer.njk文件底部添加下面的代码
1 | <!-- 添加显示本站已安全运行时长功能 --> |
打开.\themes\next\source\css\_common\components\sidebar\sidebar-author.styl,添加代码
1 | .site-author-image { |
首先修改post_asset_folder属性,打开_config.yml文件
1 | post_asset_folder: true |
随后在./source内创建目录用于存放所有图片
1 | cd ./source/ |
之后再将markdown内图片的引用地址按照如下规则修改
1 | # 原引用 |
效果如下
博文的原始morkdown文件,需要加上文件头给Hexo进行识别,front-matter部分用—与正文分割
1 | --- |
1 | # 标签没有分级 |
参考: hexo文章url设置___Pntehan__的博客-CSDN博客_hexo修改文章路径
首先修改./_config.yml的配置内容
1 | # 直接用category和id作为url, 防止title的中文导致乱码 |
参考: Hexo 添加图片——不用插件,超简单_一荤配一素的博客-CSDN博客_hexo post图片
首先修改post_asset_folder属性,打开_config.yml文件
1 | post_asset_folder: true |
随后在./source内创建目录用于存放所有图片
1 | cd ./source/ |
之后再将markdown内图片的引用地址按照如下规则修改
1 | # 原引用 |
效果如下

镜像来源: 下载Ubuntu桌面系统 | Ubuntu
安装Ubuntu需要先去官网下载ISO镜像(推荐下载LTS长期支持的版本),上述链接为桌面版Ubuntu,其自带GUI界面,方便操作(也可以在官网选择服务器版镜像:https://cn.ubuntu.com/download/server/)。
参考: 使用UltraISO制作ubuntu安装u盘启动盘图文教程 - 简书 (jianshu.com)
可以建立USB启动盘(推荐UltraOS软件),完成启动盘的设置后,将U盘插入物理机并重启物理机进入BIOS界面,找到USB的启动项启动即可,后续步骤按照提示逐步完成即可(根据电脑主板支持的BIOS系统的不同,中途可以会遇到出乎意料的问题,建议根据物理机的主板型号查询BIOS相关设置)。
使用VMware软件,直接选择新建虚拟机后,找到对应ISO文件即可。VMware安装时的参数对应的意义可以自行查询,一般选择推荐选项即可。
Ubuntu自带的为vi编辑器,vim是vi的升级版,兼容vi
1 | sudo apt install vim |
参考: [ubuntu20.04 LTS 更换国内163源、阿里源、清华源、中科大源 - zqifa - 博客园 (cnblogs.com)](https://www.cnblogs.com/zqifa/p/12910989.html#:~:text=ubuntu20.04 LTS 更换国内163源、阿里源、清华源、中科大源 Ubuntu 20.04 是 Ubuntu 的第,LTS 版本,其重大更新和改进将在 2030 年前终止,计划于2020年 4 月 23 日发布。)
1 | # 备份源文件 |
1 | ### 163源 ### |
1 | sudo apt-get install openssh-server |
注:配置私钥免密ssh登录部分详见 /协议栈/ssh 部分
1 | sudo apt install net-tools |
1 | sudo apt install firewalld |
参考: 一篇读懂 Linux 用户管理与操作 - 知乎 (zhihu.com)
Linux用户组相关信息都储存于以下文件中
1 | # 储存内容格式 |
1 | # 用户组名 : 密码 : 用户组管理员账号 : 该用户组包含的账号名称 |
1 | id <user> # 展示指定user的UID、GID、用户组信息等,默认为当前有效用户 |
1 | # 切换用户 |
1 | # 切换用户组 |
在 /etc/sudoers 文件内的用户普通用户可以通过 sudo 命令,使用 root 用户权限来执行命令
1 | # 查看sudo权限设置 |
可以修改授权,示例:
1 | # testuser 可以利用 sudo 以任何身份执行任何命令 |
1 | sudo su # 需要有sudo权限才能管理用户 |
再将webapp用户加入docker组,使其拥有使用docker命令的权限
1 | # 添加docker用户组 |
参考:
 参考
参考